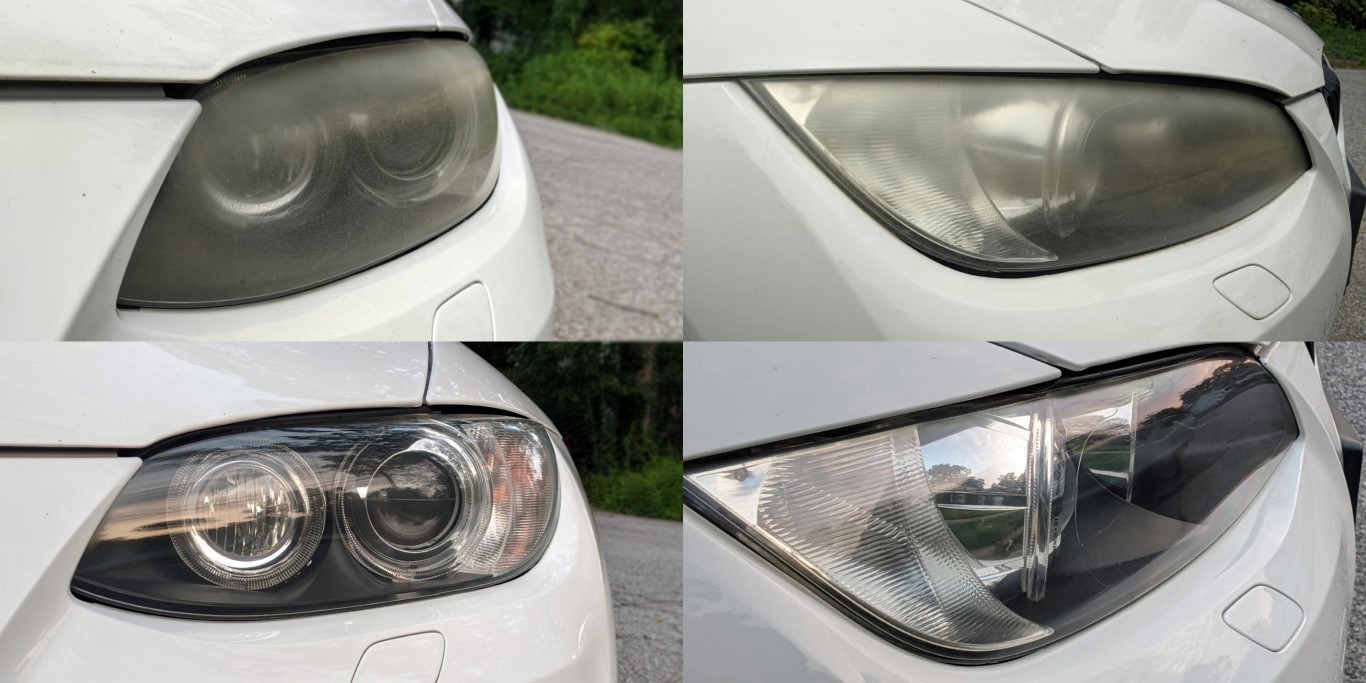
Selecting a Quality Restoration Kit
For those seeking a hassle-free option, a quality restoration kit can be beneficial. Kits usually include a range of grits of sandpaper, polishing compounds, and applicators. Most kits come with detailed instructions, simplifying the restoration process.
Using the kit’s components ensures compatibility and streamlines the project. Look for kits that include extras like a polishing pad attachment for a drill. This can make polishing faster and more efficient. Combining kits and individual materials allows customization for the best results.
Arming oneself with these essential tools and materials, a successful DIY headlight restoration is within reach.
Preparing Your Headlights for Restoration
Before restoring your headlights, ensure that you clean the surface thoroughly and properly mask around the headlight to protect your car’s paint job. Proper preparation will ensure a better finish and prevent accidental damage.
Cleaning the Surface
Start by washing the headlights with soap and water. Use a clean towel to dry them. Any dirt or debris left can scratch the surface during the restoration process.
Next, use isopropyl alcohol to clean off any remaining oils or residues. Alcohol helps to ensure that the restoration materials adhere properly. Apply the alcohol with another clean towel, wiping the surfaces gently yet thoroughly.
Inspect the headlights closely. If they’re still dirty, repeat the cleaning steps. Any remaining dirt will negatively affect the final outcome. Proper cleaning ensures that the restoration process begins on a smooth surface.
Masking Around the Headlight
Use automotive masking tape to protect the areas around the headlights. Cover the car’s paint and trim completely. This tape is designed to stick well without leaving residue.
Start by applying the tape directly around the headlight edges. Ensure all paint and trim near the headlights are covered. Press the tape down firmly to secure it.
Use two layers of tape where precision is crucial. This additional layer offers extra protection in case balance or control slips during the restoration process. Proper masking is crucial to avoid unintentional scratches or damage to other parts of your vehicle.
Sanding Process Explained
Sanding is a crucial step in headlight restoration that ensures the surface becomes smooth and clear. The process typically involves both wet and dry sanding, using different grit sandpapers.
The Importance of Wet Sanding
Wet sanding involves using water alongside the sandpaper to reduce friction and prevent scratching on the headlight surface. This method is preferred because it keeps the area cool and helps to flush away debris that can cause further imperfections.
Wet sanding begins with a lower grit sandpaper, around 800-1000 grit, and gradually progresses to higher grits like 2000 or 3000. The water spray bottle is used to keep the surface constantly moist, ensuring even sanding and improved results. Wet sanding is essential for achieving a smooth and polished finish.
Strategies for Rough Sanding and Fine Sanding
Rough sanding removes the initial layer of oxidation or cloudiness from the headlight. Starting with 800-1000 grit sandpaper sheets, the sanding disc can be used in consistent, circular motions. A uniform and steady pressure avoids creating deep scratches.
Fine sanding, on the other hand, refines the surface after the rough sanding stage. Using higher grit sandpapers like 2000 or 3000, the smooth finish starts to emerge. Continuous water application during this phase is vital for achieving clarity. Fine sanding must be thorough, allowing the headlight to regain its transparency and shine.